Tracking Time in Jira: A Practical Beginner's Guide for Busy Teams
New to time tracking in Jira, or finally ready to take it seriously? This guide walks you through a simple, practical setup using Timesheet Tracking for Jira so you get accurate hours, clearer reports, and less admin overhead.
Timesheet Tracking for Jira

If your team already lives in Jira, it makes sense to track time there too. The challenge is doing it in a way that’s accurate, fast, and actually used by everyone.
This guide shows a simple way to start tracking time in Jira using Timesheet Tracking for Jira, without overwhelming your team.
Step 1: Decide what you really need to track
Before switching on any timers, agree on the basics:
- Purpose – Billing, internal cost tracking, forecasting, or all three?
- Granularity – 15-minute blocks, 30 minutes, or full hours?
- Work attributes – Do you need fields like _Billable/Non-billable_, _Client_, _Work type_?
In Timesheet Tracking for Jira you can model this in Work Attributes so every log entry captures the same key details.
Step 2: Make logging time part of daily work
The fastest way to kill a time tracking rollout is to bolt it on as a separate tool. Instead, keep it where the work already happens.
- Log directly on Jira issues as work is done.
- Use the Timer to track in real time instead of guesstimating at day’s end.
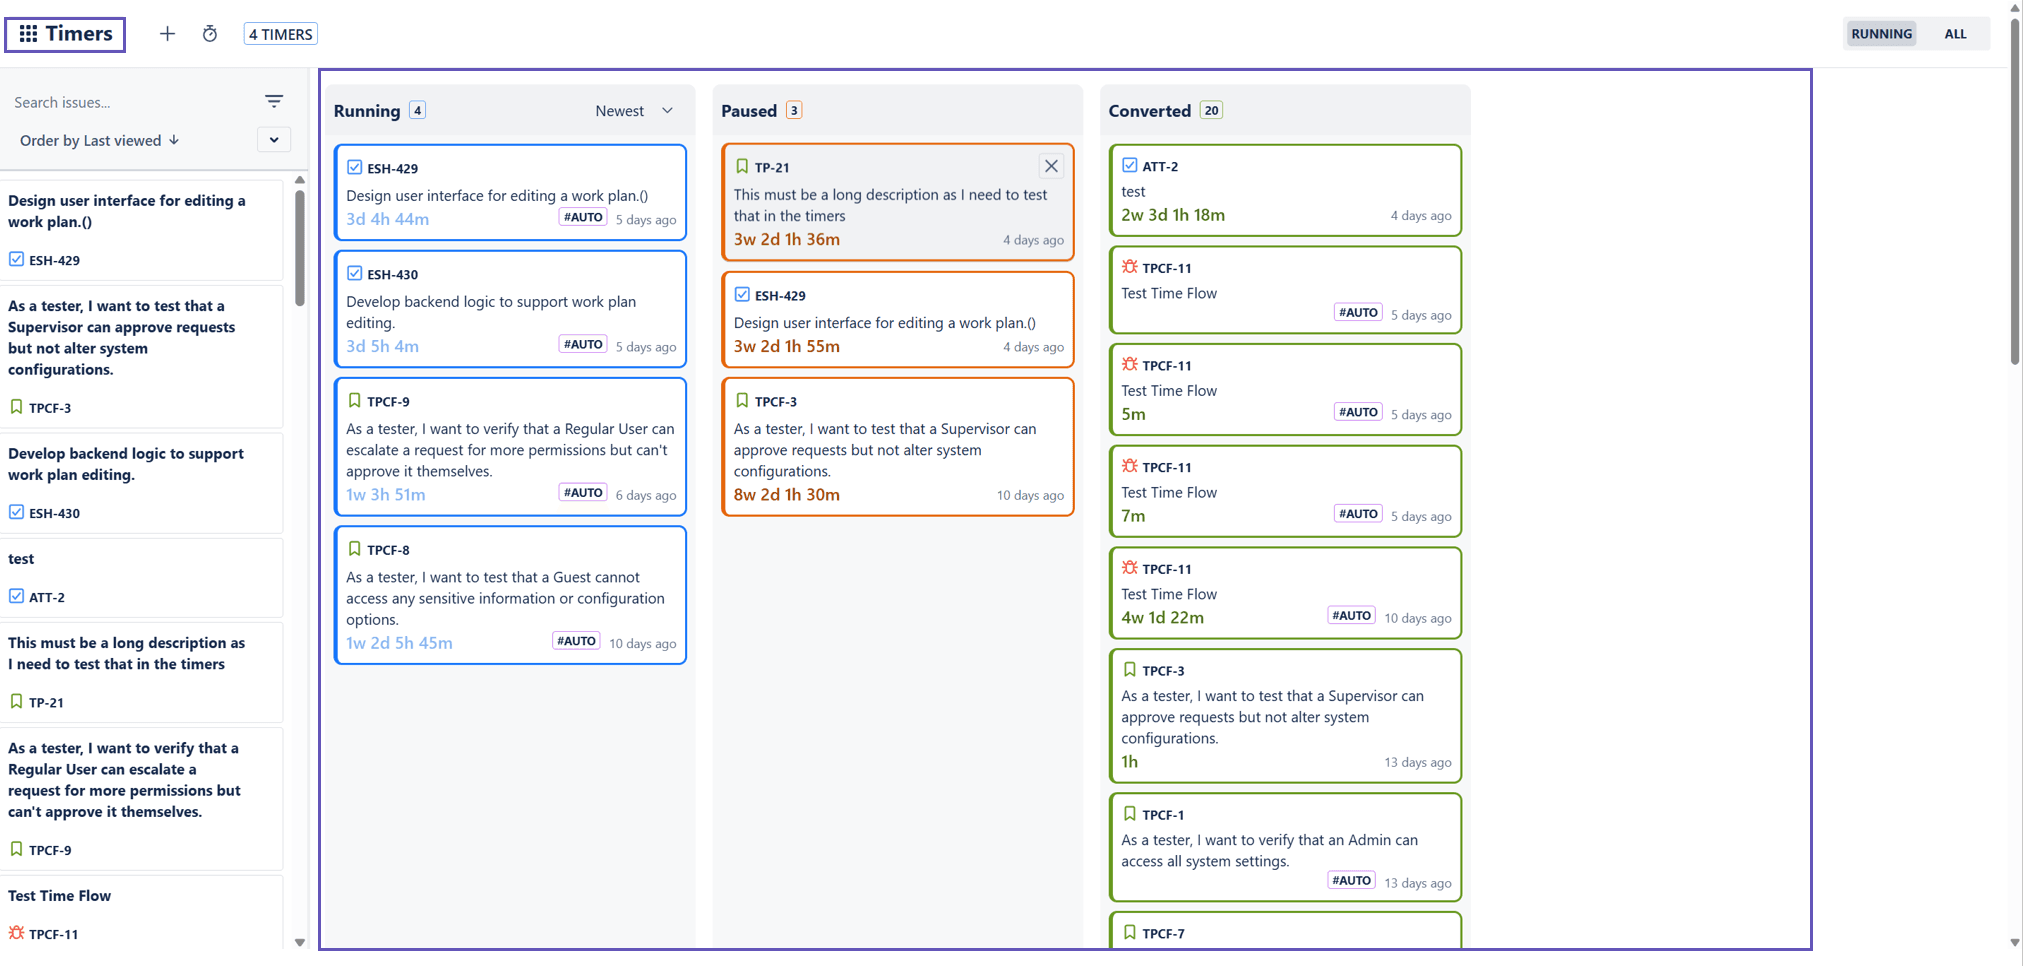
With the automatic timer, developers can start work on an issue and have their time captured while they focus on the task.
Step 3: Give teams a clear view
People log better when they can see their day at a glance.
The Timesheets view in Timesheet Tracking for Jira lets each user review and adjust their hours for a date range without hunting through individual issues.
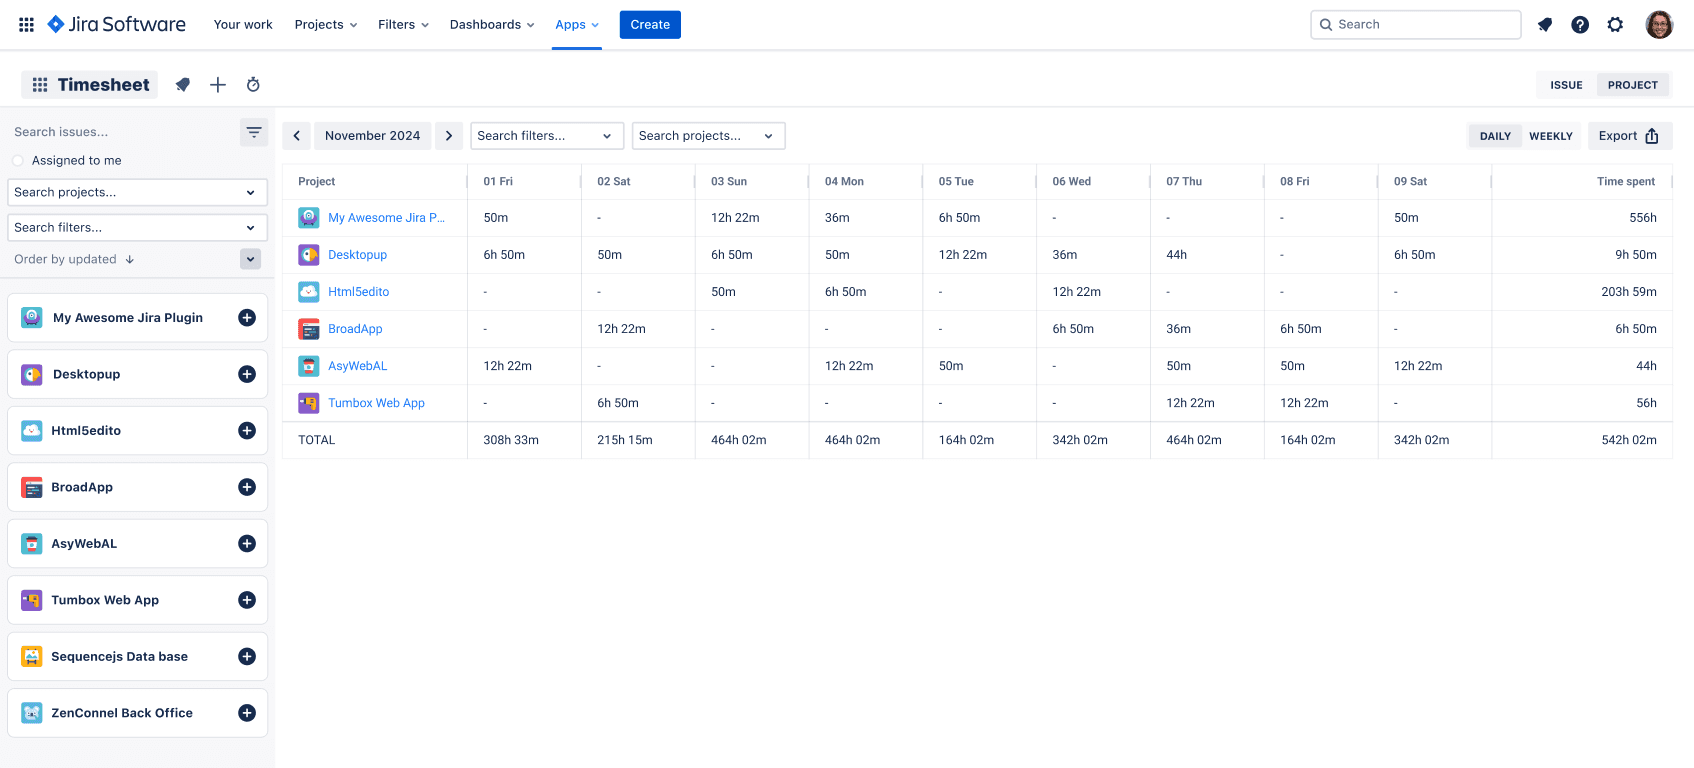
Encourage a simple routine:
- Fill in time during the day as you finish issues.
- Do a quick 5-minute review before logging off.
- Correct obvious gaps or duplicates.
Step 4: Turn time data into useful reports
Once the team is logging consistently, move quickly to value. Use the Reports feature to answer questions like:
- How many billable hours did we deliver per client this month?
- Which epics or components consume the most time?
- Are specific teams or roles overloaded?
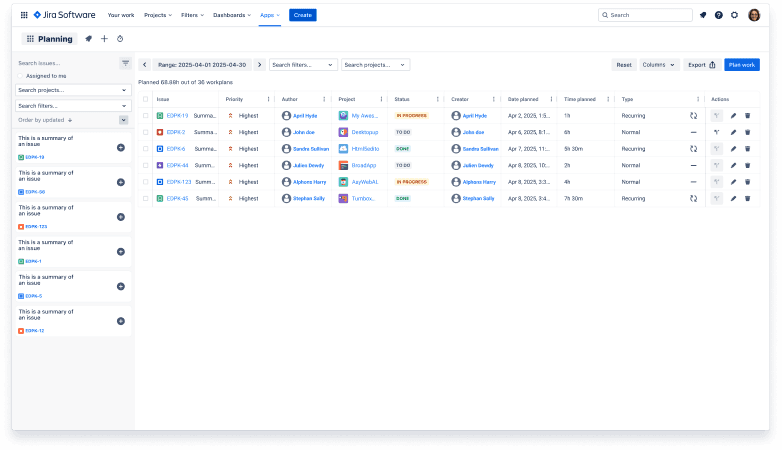
Combine reports with the Planning view to compare _planned_ vs _logged_ time and adjust workloads before sprints go off track.
Step 5: Start small, then standardize
Begin with one project or team, refine the workflow, then roll it out:
- Pilot with a motivated squad for 2–3 sprints.
- Standardize work attributes and logging rules.
- Document expectations in your Jira project onboarding.
If you need to align this with billing or approval flows, review the app’s features and pricing to pick the right setup for your organization.
Ready to track time in Jira?
Start your free 30-day trial of Timesheet Tracking on the Atlassian Marketplace.